



 Home
How to Print a Coffee Table Book: Paper, Size, Binding & Finishing Guide
 Nov 06,2026

 SESE
How to Print a Coffee Table Book: Paper, Size, Binding & Finishing Guide
Coffee table books are designed to showcase visual content through high-quality printing, thoughtful layouts, and carefully selected materials. Whether the subject is photography, art, architecture, fashion, travel, food, or interior design, every production decision affects how the finished book presents images, communicates information, and feels in the reader's hands.
For authors, publishers, brands, and creative studios, producing a coffee table book involves more than choosing an attractive cover. The right combination of book size, paper stock, printing method, binding, and finishing helps translate the original artwork into a professionally manufactured publication.
This guide explains how to print a coffee table book, covering the key specifications, production stages, cost factors, and common mistakes to consider before sending your project to a printing manufacturer.
1. Choose the Right Format and Size for Your Coffee Table Book
The size and format of a coffee table book influence how readers experience its content. The right dimensions should complement the subject matter, image proportions, layout, and intended use of the finished book.
Common Coffee Table Book Sizes

Square Format
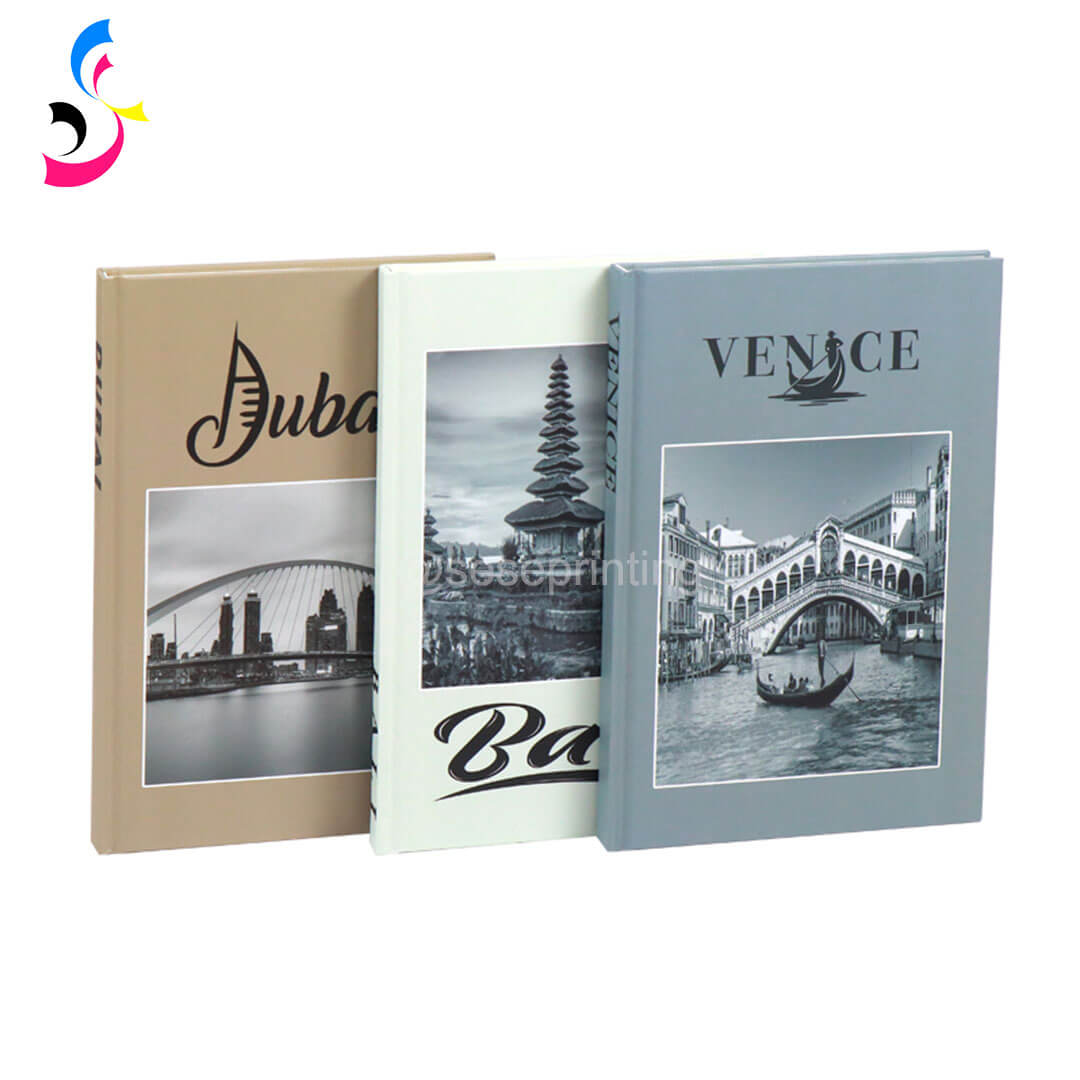
Portrait Format
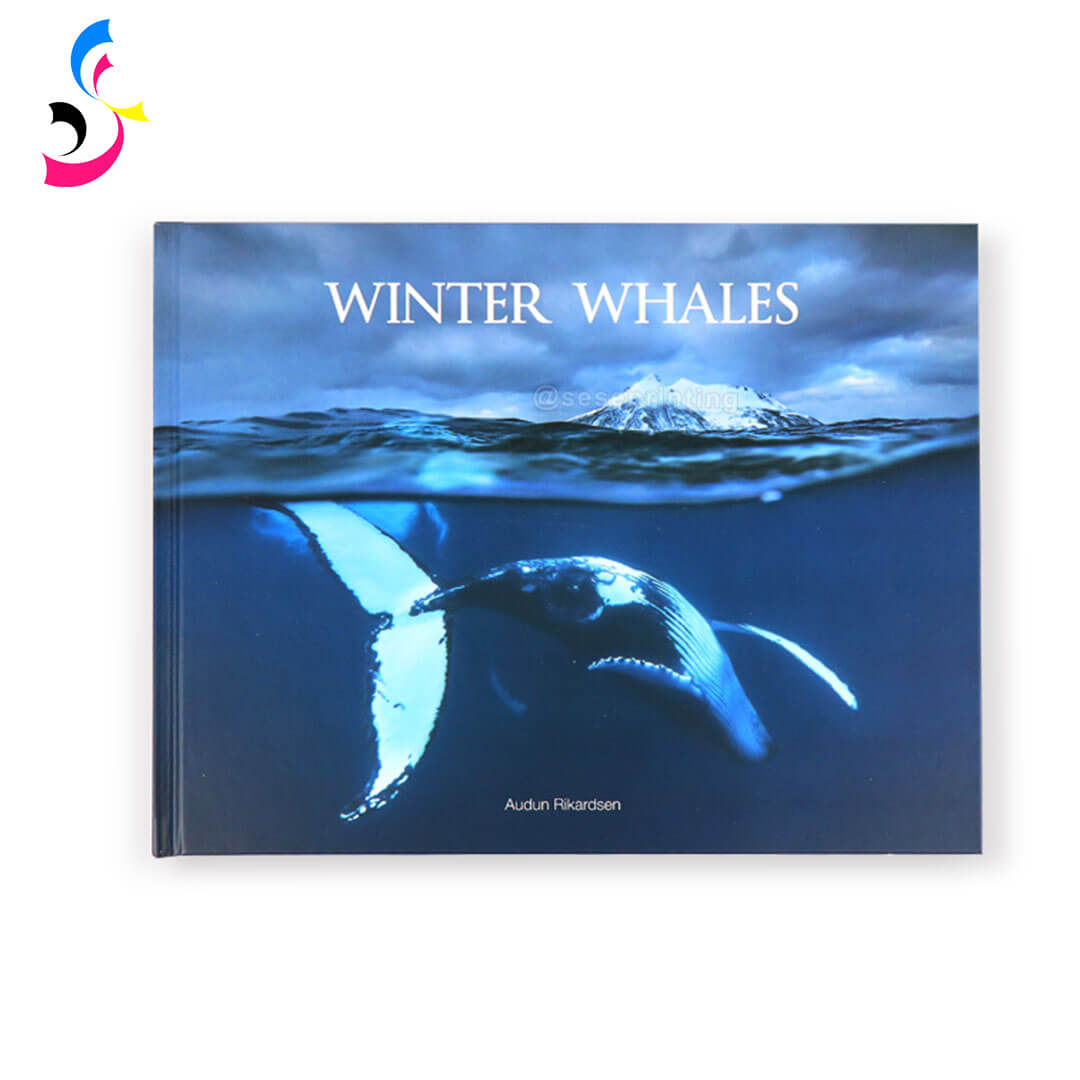
Landscape Format
Square Format
Square books are popular for photography collections, fashion portfolios, lifestyle publications, and art books. Their balanced proportions work well with square images, symmetrical layouts, and modern visual presentations.
Portrait Format
Portrait-oriented books are suitable for architecture, biographies, fashion photography, and editorial content. They offer a familiar reading experience and work well for vertical photographs and text-heavy layouts.
Landscape Format
Landscape books are ideal for panoramic photography, interior design, travel publications, automotive photography, and architectural projects. Their wider pages provide more room for horizontal images and double-page spreads.
Custom Sizes
Custom dimensions allow publishers and brands to create distinctive publications tailored to specific content or presentation requirements. Unusual proportions can help a book stand out, although they may affect paper usage, production efficiency, packaging, and shipping costs.
How to Choose the Best Size
Before finalizing your book dimensions, consider the following factors:
- Content type: Determine whether your images are primarily portrait, landscape, square, or panoramic.
- Layout requirements: Consider the space needed for captions, descriptions, and full-page images.
- Display purpose: Decide whether the book will be used as a portfolio, a retail publication, a brand presentation, or a decorative book.
- Page count: Larger formats and heavier paper can significantly increase the finished book's thickness and weight.
- Budget and shipping: Large-format books may require additional packaging and incur higher transportation costs.
Before finalizing the dimensions, confirm the finished trim size with your printing manufacturer. The trim size determines the final page dimensions after the printed sheets have been bound and cut.
2. Select the Best Paper for Coffee Table Book Printing
Paper selection has a direct impact on image reproduction, color appearance, page durability, and the overall character of a coffee table book. The best option depends on whether the publication prioritizes vivid photography, fine-art reproduction, tactile texture, or extensive text.
2.1 Coated Paper vs. Uncoated Paper
Gloss Coated Paper
Gloss coated paper provides a smooth, reflective surface that can produce vivid colors, strong contrast, and sharp image details. It is often suitable for fashion photography, product images, colorful artwork, and publications that emphasize visual impact.
However, the reflective surface may create glare under certain lighting conditions.
Matte Coated Paper
Matte coated paper offers a smoother, less reflective surface. It is a good choice for contemporary photography books, architecture publications, art collections, and minimalist designs.
Its reduced glare can make images more comfortable to view, particularly in books intended for extended browsing.
Silk or Satin Coated Paper
Silk and satin papers provide a balance between image clarity and surface sheen. They can deliver detailed photographs and rich colors without the strong reflectivity associated with gloss paper.
This makes them a versatile option for many premium coffee table books.
Uncoated Paper
Uncoated paper has a more natural surface and can create a softer, understated appearance. It is often used for illustration-led publications, minimalist photography, literary projects, and designs that emphasize texture.
However, uncoated paper may reproduce images differently from coated paper, particularly in terms of contrast, color saturation, and fine detail.
2.2 Paper Weight and Thickness
Paper weight influences the stiffness and opacity of individual pages. A heavier stock may provide a substantial feel, while a lighter stock can help control the finished book's overall thickness and weight.
For many coffee table books, paper in the approximate range of 128–200 gsm is worth evaluating, particularly for coated interior pages. The appropriate weight depends on the paper grade, page count, binding method, and desired finished thickness.
Keep in mind that gsm measures paper weight, not exact thickness. Two paper stocks with the same gsm may have different bulk, stiffness, and opacity.
2.3 Factors to Consider When Selecting Paper
Color reproduction: Choose a surface that supports the image quality and visual style you need.
Opacity: Consider whether content printed on the reverse side may show through.
Page flexibility: Ensure the stock works with the selected binding and opening requirements.
Finished weight: Balance a substantial feel against handling, packaging, and transportation considerations.
Consistency: Request paper specifications and, where appropriate, physical samples before approving production.
For image-heavy publications, it is useful to review representative photographs printed on the proposed paper before confirming the final specification.
2.4 Match Paper to Your Content
Different types of coffee table books have different paper requirements.
| Book Type | Recommended Paper | Direction Main Consideration |
|---|---|---|
| Photography books | Gloss, matte, or silk coated paper | Image detail and color reproduction |
| Art and illustration books | Matte or silk coated paper | Color balance and visual texture |
| Architecture and interior design books | Matte or silk coated paper | Fine details and comfortable viewing |
| Fashion and product books | Gloss or silk coated paper | Color intensity and sharpness |
| Minimalist or literary photography books | Uncoated or matte paper | Natural appearance and reduced glare |
3. Choose the Right Printing Method and Color Specifications
The printing method affects image quality, production efficiency, color consistency, and overall cost. For coffee table books, the choice should reflect the quantity required, the complexity of the artwork, and the level of visual consistency expected across the entire production run.
Offset Printing
Offset printing is often a suitable choice for medium-to-large production quantities, particularly when a project contains extensive photography, full-color artwork, or numerous pages.
Its advantages include:
- Consistent reproduction across a production run.
- Efficient unit costs at suitable quantities.
- Support for a wide range of paper stocks and book formats.
- Compatibility with various cover and finishing processes.
Offset printing is commonly considered for publishers, brands, photographers, and institutions producing books for distribution, retail, exhibitions, or corporate use.
Digital Printing
Digital printing can be useful for certain lower-quantity projects, review copies, prototypes, and publications requiring shorter production schedules. Availability, paper compatibility, and image quality depend on the equipment and manufacturer.
For larger orders, compare the total production cost and the required color consistency rather than selecting a printing method based on unit price alone.
Prepare Accurate Color Specifications
Most full-color commercial printing workflows use CMYK, which combines cyan, magenta, yellow, and black inks to reproduce a wide range of colors.
Artwork created in RGB may display colors that cannot be reproduced accurately using the selected CMYK printing process. Converting images and checking critical colors before production helps reduce unexpected differences between screen previews and printed pages.
For reliable results:
- Confirm the manufacturer's preferred color profile and file specifications.
- Prepare high-resolution images, generally around 300 dpi at the intended print size for photographic content.
- Check shadow detail, highlights, skin tones, gradients, and image contrast.
- Identify brand colors or other critical colors that may require special attention.
- Request a proof when color accuracy is especially important.
A calibrated monitor helps with file preparation, but it cannot fully predict the final printed appearance. Paper color, surface characteristics, ink behavior, and viewing conditions all influence the result.
4. Select the Best Binding for a Coffee Table Book
Binding determines how the pages are assembled, how the book opens, and how well the finished publication withstands repeated handling. The most appropriate method depends on the page count, paper thickness, book dimensions, and intended use.
Hardcover Binding
Perfect Binding
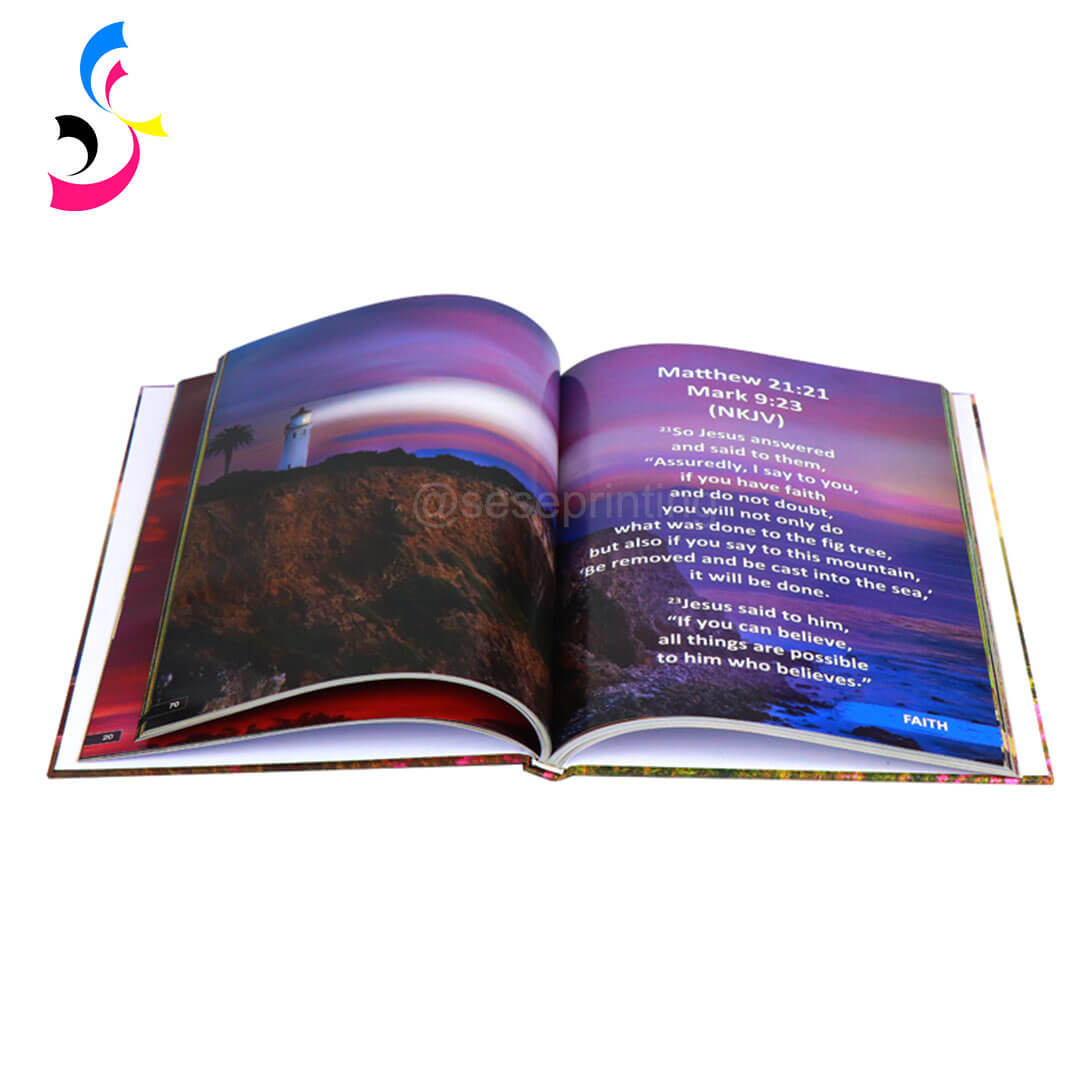
Lay-flat Binding
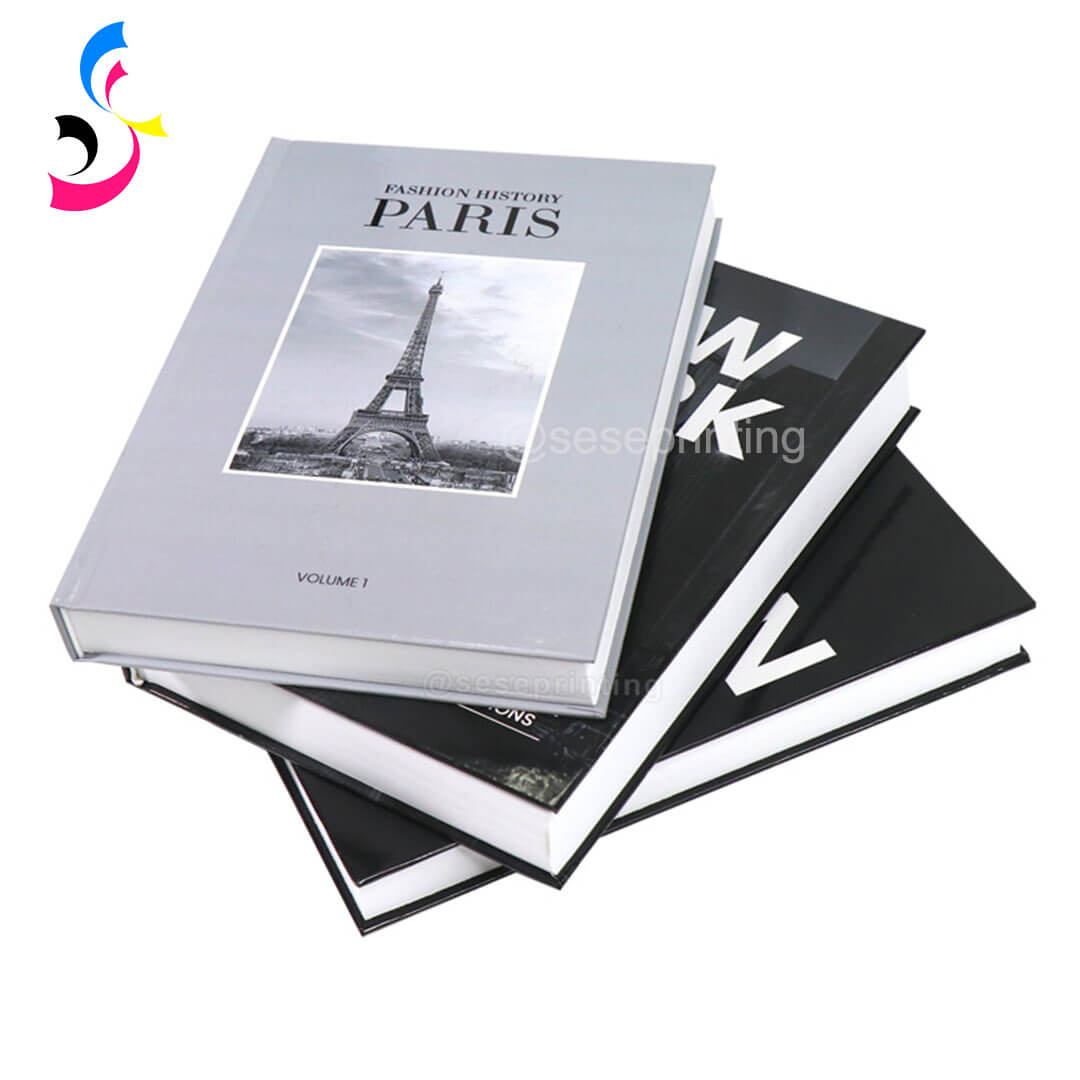
Hardcover Binding
Hardcover binding uses rigid boards covered with printed paper, cloth, or other materials. It is a popular choice for coffee table books because it provides a solid structure and supports a wide range of cover treatments.
Hardcover books work well for art collections, photography books, architectural publications, corporate histories, and commemorative editions.
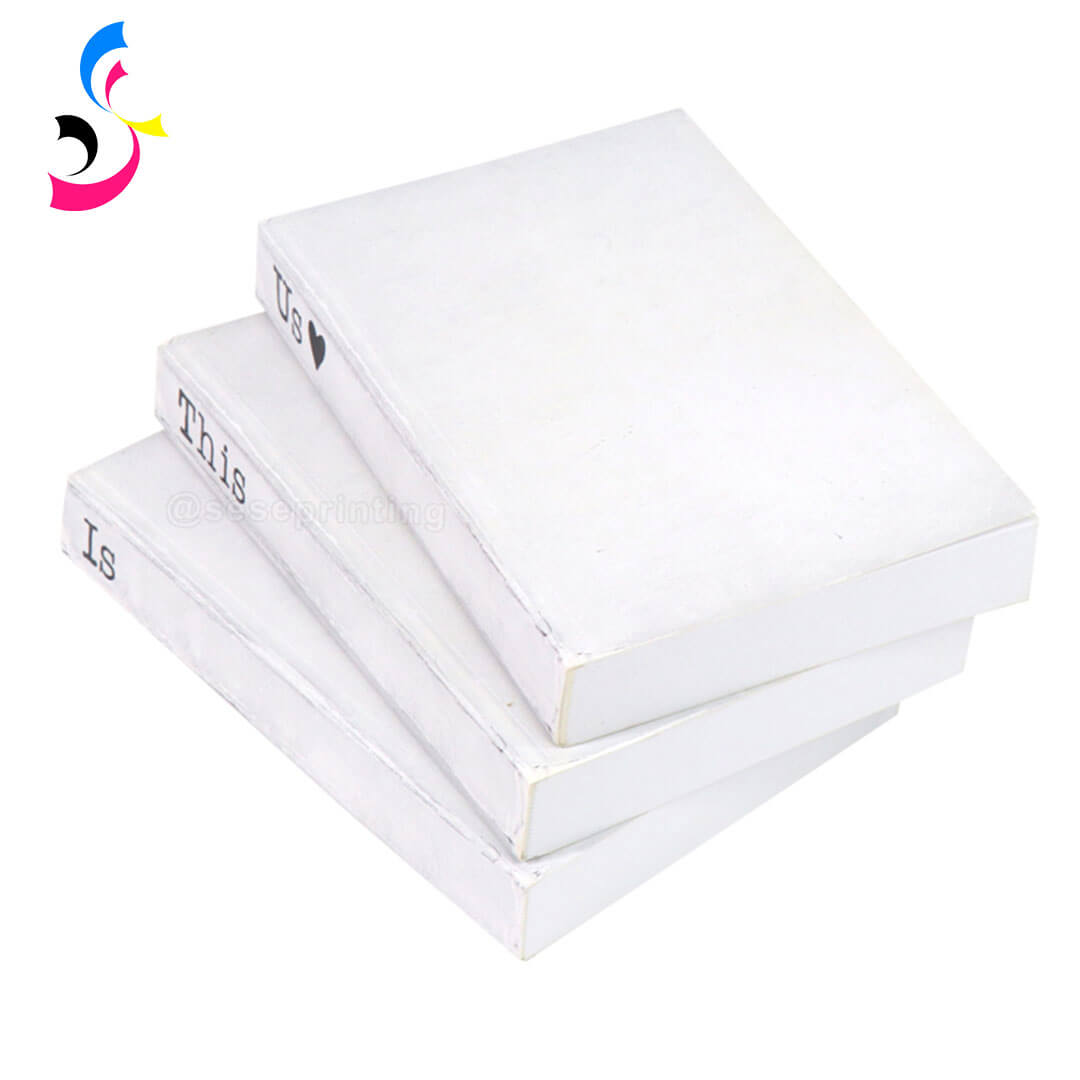
Perfect Binding
Perfect binding attaches the interior pages to a soft cover using adhesive along the spine.
It is suitable for art catalogs, photography collections, design portfolios, promotional publications, and other projects where a paperback format is preferred.
Compared with hardcover binding, perfect binding generally offers a lighter and more flexible finished product. It can also be an economical option for projects that do not require rigid covers.
Smyth-Sewn Binding
Smyth-sewn binding joins folded page sections through sewing before the sections are assembled into the book block. This construction can provide good durability and opening performance, depending on the overall design and materials.
It is worth considering for substantial publications that will be handled frequently or need a robust binding structure.
Lay-Flat and Enhanced Opening Options
For panoramic photography and images that span two facing pages, opening performance is particularly important.
How to Match Binding to Your Project
- Does the book contain panoramic images across two pages?
- Will readers frequently open the book to view individual photographs or artwork?
- Is the page count suitable for the proposed construction?
- How heavy will the finished book be?
- Does the project require a durable hardcover for long-term display or reference?
Binding should be evaluated alongside paper selection because paper thickness, grain direction, and page count affect the final book block and opening behavior.
5. Explore Cover Finishing Options for a Premium Look
The cover establishes the first visual impression of a coffee table book. A well-chosen finishing treatment can complement the subject matter, distinguish the publication, and create a cohesive appearance without distracting from the artwork.

Matte Laminated

Glossy Laminated

Soft-touch Laminated

Foil Stamping

Embossing

Debossing

Spot UV
Matte, Gloss, and Soft-Touch Lamination
Matte lamination creates a subdued, smooth appearance and works well with minimalist designs, architectural photography, and understated art publications.
Gloss lamination enhances surface shine and can make colorful cover artwork appear more vibrant. It is often used for photography-heavy publications and visually bold designs.
Soft-touch lamination provides a smooth, velvety surface that adds a distinctive tactile quality. It is frequently used for premium editions, luxury brand books, and special presentation projects.
Both options provide a protective surface layer, although their scratch resistance and handling characteristics vary by material and specification.
Foil Stamping
Foil stamping applies metallic or specialty foil to selected areas of the cover. Gold, silver, copper, and other foil colors can highlight a title, logo, border, or decorative element.
This treatment is often used for art books, fashion publications, commemorative volumes, and branded coffee table books.
Embossing and Debossing
Embossing raises selected design elements above the surrounding surface, while debossing presses them into the material. These techniques add physical dimension and can be combined with foil stamping for more detailed cover treatments.
They are particularly effective when the cover design relies on typography, geometric patterns, or a small number of distinctive visual elements.
Spot UV
Spot UV applies a glossy coating to selected areas of the cover.
This contrast between matte and gloss surfaces can create a distinctive visual effect while keeping the overall design clean.
Cloth and Other Cover Materials
Cloth-covered hardcovers offer a tactile alternative to printed paper covers. Depending on the selected material, the cover can incorporate foil-stamped titles, embossed details, or printed and mounted design elements.
Other options include textured paper, printed case covers, and combinations of different materials.
Combine Finishes Carefully
Premium coffee table books may combine several finishing techniques, such as:
- Matte lamination with gold foil stamping.
- Cloth covers with debossed titles.
- Printed covers with Spot UV details.
- Dust jackets with foil accents.
- Hardcover cases with matching printed endpapers.
However, adding more finishes does not automatically create a better result. A well-planned combination of materials and finishing techniques can deliver a stronger visual identity while keeping production costs under control.
6. Prepare Your Artwork and Book Files for Printing
Correct file preparation is essential for preventing avoidable production problems. Even well-designed artwork may require adjustments before it can be printed, trimmed, and bound accurately.
Set Up the Correct Page Dimensions and Bleed
Artwork extending to the edge of a page generally requires bleed beyond the final trim line. A common starting point is 3 mm or 0.125 inches on each applicable edge, but the exact requirement should be confirmed with your manufacturer.
Keep important text, logos, and image details within the recommended safe area so they are not accidentally trimmed.
Use High-Resolution Images
For most photographic content, 300 dpi at the final placed size is a useful target. Enlarging a small image does not create additional genuine detail, so check the effective resolution of every image in the layout.
Pay particular attention to full-page photographs, fine artwork, and images that span two pages.
Check Fonts and Color Settings
Embed fonts or convert them to outlines when appropriate for the production workflow. Confirm that the document uses the required color settings and that linked images are available at their intended resolution.
If the publication contains spot colors, metallic elements, or special printing instructions, identify these clearly in the supplied files.
Prepare the Cover Separately
Hardcover covers require additional technical considerations because the cover wraps around rigid boards. The complete cover layout may include the front cover, back cover, spine, and turn-ins.
Spine width depends on the page count, paper thickness, and binding construction. Avoid estimating the spine width without the manufacturer's specifications.
For books with dust jackets, prepare the jacket artwork separately from the case cover. The jacket layout must account for the flaps, spine, folds, and bleed.
Confirm the Final File Package
Before submitting your files, check that:
- Interior pages follow the required page order.
- Trim size and bleed settings are correct.
- Images have suitable resolution.
- Fonts and linked assets are handled correctly.
- The cover and spine match the final production specifications.
- Page count, paper stock, binding, and finishing instructions are confirmed.
- Any special color or finishing elements are clearly identified.
A preflight review and a properly prepared proof can help identify issues before the full print run begins.
7. Understand the Coffee Table Book Printing Process
Understanding the production workflow helps authors, publishers, and brands plan their projects more effectively. Although the details vary by manufacturer and book specification, coffee table book production generally follows several stages.
Step 1: Confirm the Specifications
The project begins with the key production details: finished size, page count, quantity, paper stock, printing method, binding, cover material, finishing, and packaging requirements.
These specifications provide the basis for production planning and quotation.
Step 2: Review the Artwork
The manufacturer checks the supplied files for technical suitability, including page dimensions, bleed, image resolution, color settings, and cover layout.
Any issues that could affect printing or binding should be addressed before production proceeds.
Step 3: Produce Proofs
Depending on the project, proofing may include a digital proof, a printed color proof, or a physical sample. Each serves a different purpose.
A digital proof is useful for checking layout and text, while a physical proof can provide a better indication of printed color, paper appearance, and selected finishing effects.
Step 4: Print the Interior and Cover
Once the artwork and specifications are approved, the interior pages and cover materials are printed according to the agreed production plan.
Color checks and production monitoring help maintain consistency throughout the run.
Step 5: Complete Binding and Finishing
The printed sheets are assembled into the book block, trimmed, and bound. Hardcover projects then undergo case-making and casing-in, followed by any additional finishing steps required by the specification.
Processes such as foil stamping, embossing, lamination, and dust-jacket production may take place at different stages depending on the chosen construction.
Step 6: Conduct Quality Control
Finished books should be checked against the approved specifications. Important inspection points include:
- Color consistency and image reproduction.
- Page sequence and completeness.
- Binding strength and opening performance.
- Cover alignment, trimming, and spine positioning.
- Foil, lamination, embossing, or other finishing quality.
- Packaging condition and quantity.
Step 7: Pack and Prepare for Delivery
Books are packed according to their size, weight, quantity, and shipping requirements. Protective packaging is especially important for large-format hardcover publications because their corners and covers may be vulnerable to handling damage.
For international orders, confirm carton specifications, shipping arrangements, and delivery schedules before production begins.
8. Common Mistakes to Avoid When Printing a Children's Book
The cost of printing a coffee table book depends on the combination of materials, manufacturing processes, order quantity, and delivery requirements. Comparing quotations is most useful when each manufacturer prices the same specifications.
Book Size and Page Count
Larger books require more paper and may use larger printing sheets or different production configurations. A higher page count increases material consumption and affects the binding structure and finished weight.
Paper Type and Weight
Specialty paper, heavier stocks, and certain textured materials may cost more than standard options. Paper availability can also influence production schedules.
Printing Method and Quantity
Offset printing typically becomes more cost-efficient per copy as production quantity increases, while digital printing may be suitable for projects with different quantity requirements. The most economical option depends on the specific job and equipment.
Binding and Cover Construction
Hardcover books generally involve more materials and manufacturing steps than simpler paperback constructions. Sewn binding, lay-flat requirements, cloth-covered cases, and other specialized structures can further affect the quotation.
Additional Finishing
Lamination, foil stamping, embossing, debossing, dust jackets, printed endpapers, and custom packaging all contribute to the total cost. The impact depends on the selected materials, coverage, complexity, and production method.
Packaging and Shipping
Large-format books can be heavy and bulky, making packaging and freight significant parts of the overall budget. International shipping costs may also vary with the delivery destination, shipment volume, and transport method.
9. Common Mistakes to Avoid When Printing a Coffee Table Book
Even small specification errors can create problems in a visually demanding publication. Addressing the following issues early can help reduce production delays, unexpected costs, and quality concerns.
Choosing Paper Without Testing Image Quality
Paper that works well for text-heavy books may not reproduce photography or artwork as expected. Review representative images on the proposed stock whenever possible, especially if the publication contains dark photographs, subtle gradients, or detailed artwork.
Ignoring the Gutter in Double-Page Spreads
Important visual details can disappear into the binding area if images are positioned too close to the gutter. Keep critical subjects away from the center fold unless the selected binding construction and layout have been designed to accommodate them.
Using Low-Resolution Images
Images that look acceptable on a computer screen may appear soft or pixelated when printed at a large size. Check effective image resolution at the final placement dimensions before approving the files.
Estimating the Spine Width Too Early
Spine width depends on the final page count, paper thickness, and binding method. Designing the cover before these details are confirmed can result in incorrect spine alignment or text placement.
Selecting Finishes Without Considering the Artwork
A finish that looks attractive on its own may not complement the cover design. Review how foil, embossing, lamination, and textured materials interact with the colors, typography, and overall visual style.
Skipping the Proofing Stage
A proof provides an opportunity to identify layout, color, and production issues before the full order is manufactured. For complex or high-value projects, consider whether a physical proof or production sample is appropriate.
Comparing Quotations With Different Specifications
Two quotations may appear similar while including different paper weights, binding methods, finishing details, or packaging standards. Confirm that all quotations cover the same requirements before making a decision.
Leaving Production Planning Until the Last Minute
Artwork preparation, proof approval, material sourcing, printing, binding, finishing, and shipping all require time. Establish a realistic schedule with the manufacturer and allow time for corrections, particularly when the book includes multiple finishing processes.
10. Conclusion: Create Your Custom Coffee Table Book with SESE Printing
Printing a successful coffee table book requires more than high-quality images. The format, paper, printing method, binding construction, cover finishing, and artwork preparation all contribute to the appearance, durability, and overall value of the finished publication.
By making these decisions early and working with an experienced printing manufacturer, publishers, photographers, artists, and brands can create books that present their content professionally while maintaining control over production costs.
SESE Printing provides custom book printing and manufacturing solutions for a wide range of publishing projects, including hardcover books, photography books, art books, and other premium illustrated publications. With over 30 years of industry experience, advanced printing equipment, and a range of binding and finishing capabilities, we help customers turn approved artwork into professionally manufactured books.
From paper selection and hardcover construction to dust jackets, foil stamping, printed endpapers, and custom packaging, our team can coordinate production according to your project specifications.
Whether you are producing a photography collection, an architecture book, a luxury brand publication, or a large-format art book, we work with you to identify suitable materials and manufacturing options for your requirements.
Planning your next coffee table book project? Contact SESE Printing with your preferred size, page count, paper, binding, finishing options, and order quantity to request a customized quotation. Let us help you bring your ideas to life through professional custom book printing.
 How to Print a Childrens Book: Complete Guide for Authors and Publishers
 You May Also Like


 Tel
 Email
 Address
702 No. 21 Huizhong Road, Shiqiao St, Panyu District. Guangzhou city, Guangdong Province. China

Joy
 Whatsapp